Who I CT for:


My Blinkie

My Blog List
-
-
-
Friday. New Kits loaded to PFD8 years ago
-
-
The Wicked Witch8 years ago
-
CU BEAR IN THE CUP SCRIPT AND TEMPLATE10 years ago
-
Thanks to Allison ........10 years ago
-
HALLOWEEN TUT 411 years ago
-
Sunday, August 31, 2014
Longing for You - CT Tag Show-off
I have a CT tag show off for you today.
Using this stunning kit by WD Designz called 'Chaotic Devotion'.
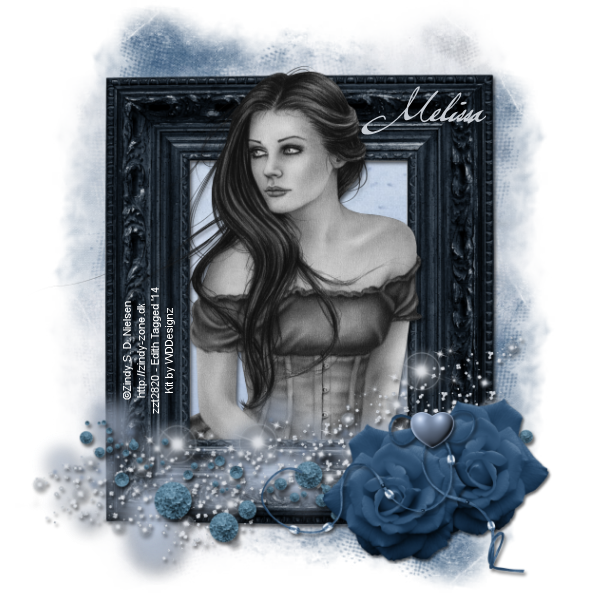
I used Zindy's beautiful tube 'The Longing' here:
http://zindy-zone.dk/shop/index.php?main_page=product_info&cPath=41_43&products_id=2128
Here is a preview of the stunning kit.

You can purchase this beautiful kit here:
Friday, August 29, 2014
PTU Tut - Bed of Roses
Bed of Roses
Tutorial by: Edith's
Creativeness

* * * * *
Scrapkit 'Gothic Garden'
by Irish Princess Designs
You can purchase this kit
HERE
Tube 'Bed of Roses' by Eos
Sparks at The PSP Project
You can purchase it HERE
Mask of your choice.
I am using MC_Mask11 by Melissaz Creationz.
I am using MC_Mask11 by Melissaz Creationz.
Font of your choice.
I am using the font 'One Starry Night'.
I am using the font 'One Starry Night'.
Program used: Jasc Paint
Shop Pro 9
* * * * * * * * * *
This tutorial is written
with the understanding that the user has a good working knowledge of
PSP.
This tutorial is written
by me, and any similarities is strictly coincidental.
* * * * * * * * * *
Let's begin!
Open a 600x600 new image
canvas – transparent background.
Select your rectangle
tool.
Change your settings for
the width to be 10.00, and check the anti-alias.
On your materials tab,
select your color choose for your foreground color. Set your
background color to nil. For my foreground color, I chose a color
from my tube choice.
Draw your rectangle to
your liking.
Convert layer to a raster
layer.
Go to effects, 3D effects,
inner bevel. Use the default settings. Select ok.
Go to effects, plugins,
eye candy, glass. Use the default settings. Select ok.
Open your tube again.
(You may need to re-size
your tube, I didn't re-size mine)
Copy and paste as a new
layer to canvas.
Position as you like.
Where I placed my tube, I
had to erase some of the tube to get the look I wanted. You may need
to do the same. To do so, you would use your eraser tool.
Open the bushes element
and re-size to 462x254.
Copy element. Using your
selection tool, select inside the rectangle that we just made.
Go to selections, modify,
expand by 5.
Paste element as a new
layer onto canvas.
Position as you like.
Go back to the opened
element. Mirror it. Copy it again.
Paste as a new layer onto
canvas.
Position as you like.
Merge those the two bushes
layers together.
Go to selections, and
select invert.
Hit delete on your
keyboard.
Go to selections, select
none.
Move layer to below the
frame (rectangle).
Open the grass element and
re-size to 420x147.
Copy and paste as a new
layer to canvas.
Position as you like.
Move to below your tube.
Duplicate. Mirror.
Position as you like.
Open the leaves1 element
and re-size to 420x178.
Copy and paste as a new
layer to canvas.
Position as you like.
Duplicate. Mirror.
Position as you like.
Open the moon element and
re-size to 416x420.
Copy element.
Using your selection tool,
select inside your frame (the rectangle).
Go to selections, modify,
expand by 5.
Paste the element as a new
layer onto the canvas.
Position as you like.
Go to selections, invert.
Hit delete on your
keyboard.
Go to selections, select
none.
Move layer to below the
bushes layer.
Open the owl element and
re-size to 420x305.
Copy and paste as a new
layer onto canvas.
Position as you like.
Open the leaves element
and re-size to 210x210.
Copy and paste as a new
layer onto canvas.
Position as you like.
Duplicate. Mirror.
Position as you like.
Open paper 7 and re-size
to 600x600.
Copy and paste as a new
layer to canvas.
Move that layer to very
bottom.
Apply mask of choice.
I am using MC_Mask11 by
Melissaz Creationz.
Merge group.
Now add a drop shadow to
all your elements and tube (except for the paper and the tubes under
the frame) to your liking.
Adding a drop shadow will
make your tag pop instead of giving it that flat look.
I used these settings: 3,
2, 60, 5.
Add your copyright
information and your license number to your tag.
I use 'Arial' font size 8
to do mine in the color black. I also used the plugin of Eye Candy
Gradient Glow with a width of 5 to go around my copyright and license
information in the color choice of afafba.
Merge visible layers
together. Give your creation a name and save as a blank copy.
Now, add a name to your
tag in your font of choice.
I used font 'One Starry
Night' in size 72. Color choice was 1a1a29.
Merge down and re-save.
.
Monday, August 25, 2014
Bee Cute Extras
Today I have some snags for you.
Using the stunning artwork of Zindy S. D. Nielsen.
I used her tube and kit bundle called 'Bee Cute'.
Font used is called 'Honeybee'.


.
Friday, August 22, 2014
Sunfire Cluster Freebie
I have a freebie cluster for you today.
Using an amazing kit by Tiny Turtle Designs.
Here is a preview of the cluster

You can download the cluster HERE
If you download, please leave some love. Thank you!
Here is what I did with it

Here is a preview of the kit 'Sun Fire' by Tiny Turtle Designs

You can purchase this kit by going here:
.
Thursday, August 21, 2014
PTU Tut - Miss White
Miss White
Tutorial by: Edith's
Creativeness

* * * * *
Scrapkit 'Snow White' by
Hania's Design
You can purchase this kit
HERE
Tube 'Miss W' by Cris
DeLara at The PSP Project
You can purchase it HERE
Mask of your choice.
I am using RR_MaskSet28_3 by Rocked by Rachel.
I am using RR_MaskSet28_3 by Rocked by Rachel.
Font of your choice.
I am using the font 'Italianno'.
I am using the font 'Italianno'.
Program used: Jasc Paint
Shop Pro 9
* * * * * * * * * *
This tutorial is written
with the understanding that the user has a good working knowledge of
PSP.
This tutorial is written
by me, and any similarities is strictly coincidental.
* * * * * * * * * *
Let's begin!
Open a 600x600 new image
canvas – transparent background.
Open element 65 and
re-size to 329x416.
Copy and paste as a new
layer onto canvas.
Position as you like.
Open your tube again.
Re-size it to 441x540.
Copy and paste as a new
layer to canvas.
Mirror. Position as you
like.
Open your tube again in
the original size.
Copy and paste as a new
layer onto canvas.
Move to just below element
65.
Using your eraser tool,
erase any of the tube that is sticking out from under the mirror.
Open element 49 and
re-size to 56x150.
Copy and paste as a new
layer to canvas.
Position as you like.
Open element 50 and
re-size to 69x51.
Copy and paste as a new
layer to canvas.
Position as you like.
Duplicate. Mirror.
Position as you like.
Open element 122 and
re-size to 450x110.
Copy and paste as a new
layer onto canvas.
Position as you like.
Duplicate. Mirror.
Merge layer down.
Duplicate again. Mirror.
Move layer a little to
make grass look spread out some.
Duplicate again, mirror.
Merge down.
Duplicate one more time.
Re-position it.
Open element 106 and
re-size to 168x164.
Copy and paste as a new
layer onto canvas.
Position as you like.
Open element 107 and
re-size to 278x399.
Copy and paste as a new
layer onto canvas.
Position as you like.
Open element 35 and
re-size to 108x132.
Copy and paste as a new
layer onto canvas.
Position as you like.
Open paper 9 and re-size
to 375x375.
Copy and paste as a new
layer to canvas.
Move to below tube under
the mirror (element 65).
Using your eraser tool,
erase any paper that is sticking out from around the mirror.
Open paper 3 and re-size
to 600x600.
Copy and paste as a new
layer to canvas.
Move that layer to very
bottom.
Apply mask of choice.
I am using RR_MaskSet28_3
by Rocked by Rachel.
Merge group.
Now add a drop shadow to
all your elements and tube (except for the paper and the tubes under
the frame) to your liking.
Adding a drop shadow will
make your tag pop instead of giving it that flat look.
I used these settings: 3,
2, 60, 5.
Add your copyright
information and your license number to your tag.
I use 'Arial' font size 8
to do mine in the color black. I also used the plugin of Eye Candy
Gradient Glow with a width of 5 to go around my copyright and license
information in the color choice of cce0e3.
Merge visible layers
together. Give your creation a name and save as a blank copy.
Now, add a name to your
tag in your font of choice.
I used font 'Italianno' in
size 72. Color choice was black. I also used the plugin of Eye Candy
Gradient Glow with a width of 7 to go around my name in the color
choice of a1b6b7.
Merge down and re-save.
.
Thursday, August 14, 2014
PTU Tut - Bumble Spring
Bumble Spring
Tutorial by: Edith's
Creativeness

* * * * *
Scrapkit 'Spring Fresh' by
Tasha's Playground
You can purchase this kit
HERE
Tube 'Jemma 2' by
kiwifirestorm at The PSP Project
You can purchase it HERE
Mask of your choice.
I am using MPM_mask05 by Millie's PSP Madness.
I am using MPM_mask05 by Millie's PSP Madness.
Font of your choice.
I am using the font 'Jenna Sue'.
I am using the font 'Jenna Sue'.
Program used: Jasc Paint
Shop Pro 9
* * * * * * * * * *
This tutorial is written
with the understanding that the user has a good working knowledge of
PSP.
This tutorial is written
by me, and any similarities is strictly coincidental.
* * * * * * * * * *
Let's begin!
Open a 600x600 new image
canvas – transparent background.
Open frame 5 and re-size
to 388x400.
Copy and paste as a new
layer onto canvas.
Position as you like.
Open your choice of tube.
Go to the layer with the
frame.
Using your selection tool,
click inside the frame.
Go to selections, modify,
expand by 5.
Go back to your tube.
Copy and paste your tube
as a new layer onto canvas.
Position as you like.
Go to selections, and
invert.
Hit delete on your key
board.
Selections, and select
none.
Move raster to below
frame.
Open your tube again.
Re-size it to 248x527.
Mirror.
Copy and paste as a new
layer to canvas.
Position as you like.
Open grass 2.
Copy and paste as a new
layer to canvas.
Position as you like.
Duplicate. Mirror.
Merge the two grass layers
together.
Open paper 1 and re-size
to 400x400.
Go to the layer with the
frame.
Using your selection tool,
click inside the frame.
Go to selections, modify,
expand by 5.
Go back to paper 1.
Copy and paste the paper
as a new layer onto canvas.
Go to selections, and
invert.
Hit delete on your key
board.
Selections, and select
none.
Move raster to below the
tube under the frame.
Now let's go back to the
tube that's just under the frame.
Duplicate the tube.
Add a drop shadow to the
bottom layer of the tube only.
Go back to the top layer
of the two tubes under the frame, now go to adjust, blur, gaussian
blur, and do a blur radius of 10.
Then go to properties and
change the blend mode to screen.
Now go to the second layer
of the tube under the frame.
Go to properties and
change the blend mode to luminance (legacy).
Merge the two tube layers
together.
Go back to properties and
lower the opacity to 40.
Open flowers 3 and re-size
to 180x83.
Copy and paste as a new
layer to canvas.
Position as you like.
Duplicate. Mirror.
Open chick 2 and re-size
to 64x72.
Copy and paste as a new
layer onto canvas.
Mirror. Position as you
like.
Open chick 3 and re-size
to 99x56.
Copy and paste as a new
layer onto canvas.
Position as you like.
Open chick 1 and re-size
to 45x66.
Copy and paste as a new
layer onto canvas.
Position as you like.
Open scatter 1 and re-size
to 278x93.
Copy and paste as a new
layer onto canvas.
Position as you like.
Duplicate. Mirror.
Merge the two scatter
layers together
Open paper 9 and re-size
to 600x600.
Copy and paste as a new
layer to canvas.
Move that layer to very
bottom.
Apply mask of choice.
I am using MPM_mask05 by
Millie's PSP Madness.
Merge group.
Now add a drop shadow to
all your elements and tube (except for the paper and the tubes under
the frame) to your liking.
Adding a drop shadow will
make your tag pop instead of giving it that flat look.
I used these settings: 3,
2, 60, 5.
Add your copyright
information and your license number to your tag.
I use 'Arial' font size 8
to do mine in the color black. I also used the plugin of Eye Candy
Gradient Glow with a width of 5 to go around my copyright and license
information in the color choice of d2f0ce.
Merge visible layers
together. Give your creation a name and save as a blank copy.
Now, add a name to your
tag in your font of choice.
I used font 'Jenna Sue' in
size 48. Color choice was black.
Merge down and re-save.
.
Tuesday, August 12, 2014
Evil Alice Cluster Freebie
I have a freebie cluster for you today.
Using Tiny Turtle Designs' awesome kit 'Evil Alice'
Here's a preview of the cluster:

To download the cluster, you can go HERE
If you download, please leave some love. Thank you!
Here is what I did with it.

And here is a preview of the kit 'Evil Alice'

You can purchase this kit by going here:
.
Friday, August 8, 2014
CT Tags Show Off
CT tag show offs for AIL.
Enjoy!
Using the amazing artwork of Thubakabra here:
This first one using 'Darkest Night' scrapkit by Tiny Turtle Designs here:

And this one using a cluster from 'A Dark Love' scrapkit by Amy Marie here:

.
Monday, August 4, 2014
Summer Secrets Cluster Freebie
I have a cluster for you today.
Using a wonderful kit by Tiny Turtle Designs' called Summer Secrets.
Preview of cluster

You can download the cluster HERE
If you download, please leave some love. Thank you!
Here is what I did with the cluster.

And here is a preview of the lovely kit 'Summer Secrets'

You can purchase this kit by going here:
.
Subscribe to:
Comments
(Atom)